Every great tattoo artist knows that grey wash tattoo technique separates average shading from jaw-dropping depth. It’s not magic — it’s method. By carefully controlling black ink dilution, you can build shadows, highlights, and mid-tones that make designs look almost three-dimensional on skin. Whether you’re just starting out or you’ve been tattooing for years, understanding tattoo shading technique properly changes everything.
The USA tattoo scene runs on grey wash — from soft realism portraits to bold Neo Traditional pieces. This guide walks you through every detail, every ratio, and every pro tip you need to get it right the first time.
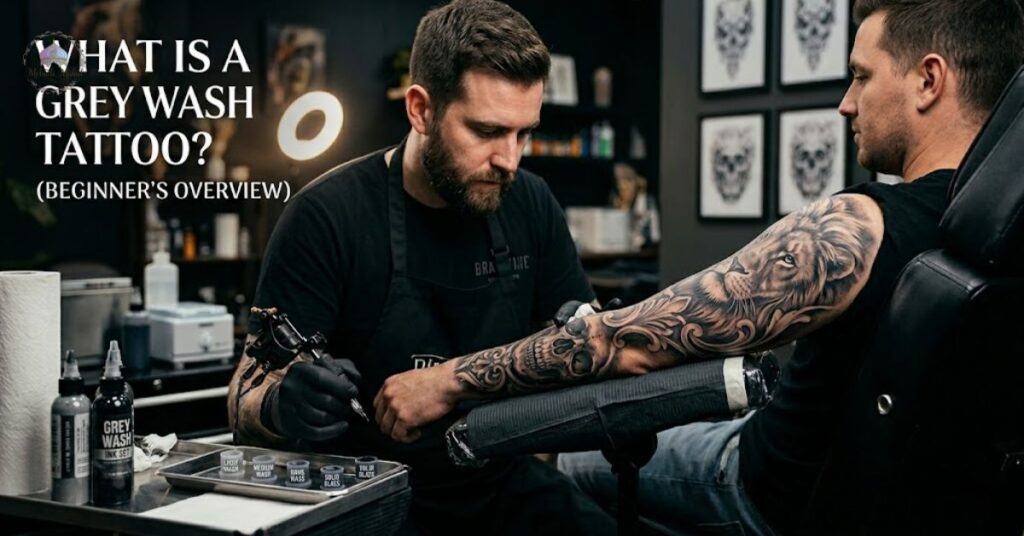
What Is a Grey Wash Tattoo? (Beginner’s Overview)
A grey wash tattoo is created by diluting black ink with either distilled water or witch hazel to produce multiple shades of grey. Instead of one flat tone, you get a full spectrum — from near-white to deep charcoal. This range allows artists to build realistic shadows, soft gradients, and lifelike depth directly into the skin. It’s the backbone of realism, portraiture, and black-and-grey tattoo styles across the USA.
The technique itself originated in American prison tattoo culture, where artists had limited supplies and improvised by watering down ink. Over time, professional artists refined it into a disciplined, precise method. Today, black ink dilution is a studied skill. Every drop matters. Every shade serves a purpose.
How Grey Wash Tattoo Ink Works on Skin
When diluted ink enters the skin, it settles into the dermis layer just like regular ink. However, because the pigment concentration is lower, the healed result appears lighter. Lighter washes fade slightly more during the tattoo healing process than darker shades. This is why artists factor in healing when choosing their ratios — what looks perfect fresh may heal a shade or two lighter than expected.
Grey Wash vs Black and Grey Tattoo – What’s the Difference?
Many people use these terms interchangeably but they aren’t the same thing. A black and gray tattoo uses both black ink and white ink together to create contrast. Grey wash, on the other hand, relies purely on black ink dilution — no white ink involved unless intentionally added for a specific effect. Grey wash is actually a tool used within black and grey tattooing rather than a separate style entirely.
Think of it this way. Black and grey is the style. Grey wash is the technique that makes that style possible. Understanding the difference helps you communicate better with clients and choose the right approach for each design.
| Feature | Grey Wash | Black & Grey Tattoo |
| Ink used | Diluted black ink | Black + white ink |
| Best for | Soft shading, gradients | High contrast realism |
| Healing result | Lightens slightly | Holds tone well |
| Skill level | Beginner-friendly | Intermediate to advanced |
| Common styles | Realism, portraits | Traditional, Neo Traditional |
Which Style Should You Choose?
Your choice depends on the design, the client’s skin tone, and the mood you want to create. Darker skin tones hold grey wash differently than lighter ones — the contrast reads less dramatically. For clients with deeper skin tones, leaning into stronger tattoo ink tones with less dilution gives a more visible result. Always consult before you commit to a mixing strategy.
Tools You Need for Grey Wash Tattooing
Getting your tools right before you even touch the machine is non-negotiable. The quality of your grey wash starts long before the needle hits the skin. You’ll need large ink caps for tattooing, a trusted black ink brand, distilled water or witch hazel tattoo ink dilutent, a tongue depressor, Vaseline, and proper plastic barrier wrap for your station. Each item plays a specific role in the process.
Don’t cut corners on ink quality. Avoid buying tattoo ink from Amazon. Counterfeit sellers regularly replicate labels from trusted brands and sell inferior — sometimes dangerous — products. Fake ink can cause severe skin reactions and ruin the healing process entirely. Stick to reputable suppliers and verified distributors in the USA market.
Budget-Friendly Grey Wash Kit for Beginners
Starting out doesn’t have to break the bank. A solid beginner setup includes Dynamic ink black, a bottle of distilled water, a pack of large ink caps, and basic Vaseline. This combination gives you everything you need to practice the drop method tattoo ink mixing technique without spending on premade sets right away. Once you’re consistent with your ratios, explore premade options.
How to Mix Grey Wash Tattoo Ink (Step-by-Step)
Mixing grey wash tattoo ink correctly is where most beginners struggle. The process seems simple but small errors create big shading problems mid-tattoo. The most widely used method is called the drop method tattoo ink technique. You add a set number of drops of black ink into your cap and fill the rest with distilled water or witch hazel. Each cap gets a different number of drops — creating a gradient of shades from light to dark.
Always work in a consistent direction. Most artists set up ink station from right to left, placing the darkest shade on the right and the lightest on the left. This prevents the most common grey wash mistake — losing track of which cap holds which shade mid-session. When your hands are moving fast and your focus is on the client, a consistent layout saves everything.
The Drop Method Explained Simply
Here’s how it works in practice. Your darkest cap gets the most drops of black. Your lightest cap gets the fewest. Fill the remaining space in each cap with distilled water. Always shake ink bottle before pouring to ensure the pigment is evenly distributed. Never use tap water — it isn’t sterile and can contaminate your setup, risking infection in the client’s skin.
Creating In-Between Tones Like a Pro
One of the most useful tricks in grey wash work is dipping between two adjacent caps to create in-between gray tones. If you need a tone between your medium and light caps, dip your needle into both. You can also use a plain water cap to create ultra-light ghost shading for the softest transitions. This technique gives you far more range than your five caps alone could provide.
Best Grey Wash Ink Ratios for Different Shades
Getting your tattoo ink mixing ratio right is the difference between professional-looking work and muddy, uneven shading. The number of drops you use depends on the size of your ink cap. Larger caps require more drops to achieve the same shade as smaller caps. This is why experienced artists always recommend using the largest caps available when doing a full grey wash tattoo setup.
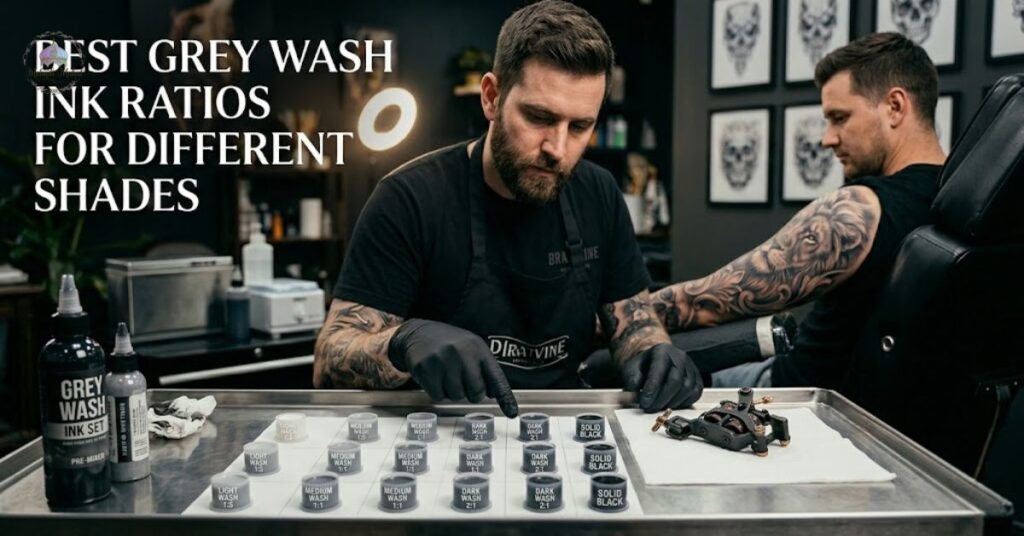
A five-cap setup gives you the most flexibility for realism and portrait work. A three-cap setup works well for American Traditional tattoo shading where you need bold, defined contrast rather than smooth gradients. Know your style before you decide how many caps to prepare.
| Shade Level | Black Ink Drops | Filler (Distilled Water/Witch Hazel) |
| Lightest | 1 drop | Fill remainder of cap |
| Light | 3 drops | Fill remainder of cap |
| Medium | 6 drops | Fill remainder of cap |
| Dark | 10 drops | Fill remainder of cap |
| Darkest | Pure black | None |
Light Wash Ratio for Highlight Areas
Light wash is the most delicate shade in your lineup. It creates soft highlights and the faintest transitions. Because it’s mostly water, it heals significantly lighter than it looks fresh. Always apply light wash knowing it will fade. Pepper shading tattoo techniques pair beautifully with a light wash cap — the tiny dot clusters blend into the skin seamlessly when the wash is correctly diluted.
Dark Wash Ratio for Shadows and Depth
Dark wash sits just below pure black in your lineup. It builds shadow without the harsh edge of a solid black line. Layering dark wash over medium grey creates depth that looks almost three-dimensional on healed skin. Avoid over-packing dark wash into one area — it can migrate toward black and lose the gradient effect you worked hard to build.
Best Tattoo Inks for Grey Wash (Top Picks)
Choosing the right ink transforms your grey wash results dramatically. Dynamic ink gray wash is one of the most trusted names in the USA tattoo industry. Its consistency makes it ideal for how to make gray wash from scratch — the pigment distributes evenly and heals predictably. Many professional artists build their entire grey wash practice around Dynamic Black because they know exactly how it behaves in the skin.
The Eternal Ink gray wash set is another top choice, especially for artists who prefer a premade gray wash ink system. Premade sets remove the guesswork from mixing. Every shade is pre-calibrated. This consistency is especially valuable for artists working in busy shops where session time is limited and precision matters most.
Premade Grey Wash Sets Worth Buying
Premade sets like the Eternal Ink gray wash set and the Lunar Graywash Set offer reliable, repeatable results. The biggest advantage is consistency — you know how the ink heals because you’ve used it before. Solid Lining Black works well as a base for DIY mixing if you prefer building your own shades. Whichever route you choose, commit to one brand and learn it thoroughly before switching.
How to Set Up Your Grey Wash Station Properly
A clean, organised tattoo workstation setup is as important as your mixing technique. Start by laying down your plastic barrier. Here’s a useful trick — put a small amount of water on the table surface before placing your barrier wrap. The moisture creates light suction that keeps the wrap from sliding around during the session. This matters more than it sounds when you’re working fast.
Once your barrier is down, use a clean tongue depressor to lay a line of Vaseline across the surface. Press your ink caps into the Vaseline line to hold them in place. This is the Vaseline ink cap trick that experienced artists swear by. Knocked-over ink caps mid-session are a nightmare — Vaseline prevents that entirely.
Organizing Your Ink Caps for Zero Confusion
Ink cap organization is the unsung hero of good grey wash work. Always place your caps in the same order for every single session. Most artists go darkest on the right, lightest on the left. This way, muscle memory kicks in and you’re never second-guessing which cap you’re dipping into. Consistency in your gray wash setup directly translates into consistency on the client’s skin.
Grey Wash on Practice Skin vs Real Skin
Fake skin tattoo practice is an essential step before working on real people. However, there’s one critical thing every beginner must understand — ink always appears darker on synthetic practice skin than it does on real human skin. This means your darkest grey wash shade will look almost black on fake skin. For this reason, remove your darkest cap entirely when practicing on synthetics. Add it back only when you move to real skin.
The visual difference between fake and real skin results can be jarring at first. Don’t let it throw you off. Use your practice sessions to perfect your drop method tattoo ink technique and your shading control. Adjust your expectations when you transition. Real skin has texture, oils, and elasticity that synthetic material simply can’t replicate.
Safety Rules Before Moving to Real Skin
Real skin tattooing carries serious responsibility. Before you work on another person, you must obtain your bloodborne pathogens certification. This is a legal requirement in most USA states. Beyond certification, maintaining a sterile tattooing environment is non-negotiable. Every piece of equipment that touches skin must be sterile. Cross-contamination can cause severe infections and legal consequences.
How to Add White to Grey Wash for Highlights
Most artists don’t realise that adding white ink to grey wash is even an option. It is — and it changes the results significantly. When you dilute black ink with water alone, the grey tones can look flat after healing. Adding white ink into the mix gives the grey actual pigment density. The result holds tone better through the tattoo healing process and doesn’t lighten as dramatically during peeling.
The rule most artists follow is simple. Add three drops of white ink gray wash to each cap — except your pure black cap and your plain water cap. This small addition creates richer, more stable grey tones that look closer to your fresh result once fully healed.
When White Ink Improves Grey Wash Results
Artist Brandon popularised this white-ink approach specifically for Neo Traditional tattoo designs. Neo Traditional work often features bold colour alongside grey shading. When the grey wash heals too light, it loses its visual weight against the colour. White-added grey wash solves this problem. The technique works equally well in realism and portrait work where tonal accuracy after healing is critical.
Common Grey Wash Tattoo Mistakes to Avoid
Every artist — beginner or experienced — makes grey wash mistakes. The most common one is using tap water instead of distilled water. Tap water is not sterile. It introduces bacteria into your ink caps and ultimately into your client’s skin. Always use distilled water or witch hazel tattoo ink dilutent to keep your setup clean and safe.
Another frequent mistake is failing to shake your ink bottle before pouring. Black ink settles over time. If you pour from an unshaken bottle, your drops contain inconsistent pigment concentration. This throws off your entire tattoo ink mixing ratio and produces uneven shading that’s impossible to predict or correct mid-session.
Why Your Grey Wash Looks Uneven (And How to Fix It)
Muddy grey wash usually comes from one of two problems. Either your caps aren’t organised consistently so you’re accidentally dipping into the wrong shade, or you’re using mismatched ink cap sizes which changes your ratios without you realising. Standardise your cap sizes and commit to the same ink cap organization system every time. Also avoid over-packing any single area — build shade gradually with multiple light passes rather than one heavy application.
Grey Wash Tattoo Healing Process – What to Expect
The tattoo healing process for grey wash work follows a predictable pattern but surprises many clients. During the first week, the tattooed area looks darker and more vibrant than the final result will be. The skin is still inflamed and the ink sits closer to the surface. By week two, peeling begins and the tattoo appears to lighten dramatically. This is normal — don’t panic and don’t pick.
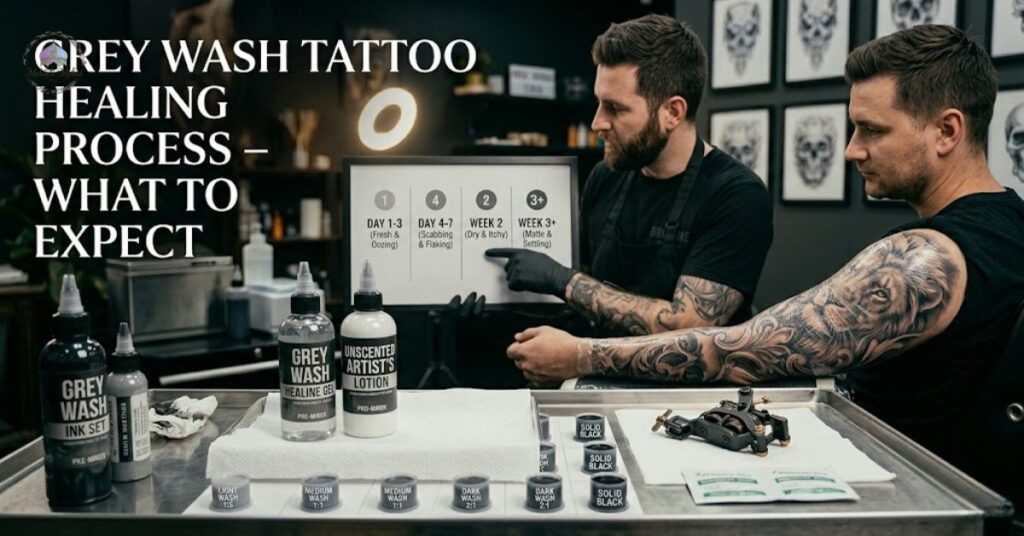
By weeks three to six, the skin fully closes over and the true healed tone emerges. Grey wash will always heal slightly lighter than it looked fresh. This is why experienced artists intentionally go slightly darker during the session, knowing the healing process will bring it back to the intended shade.
| Week | What Happens to Your Grey Wash Tattoo |
| Week 1 | Redness, swelling, ink looks very dark |
| Week 2 | Peeling starts, tattoo appears lighter |
| Week 3 | Surface heals, real tone begins showing |
| Week 4–6 | Final healed result fully visible |
Does Grey Wash Fade More Than Regular Tattoos?
Grey wash does fade slightly more than solid black work during healing. However, a well-executed grey wash tattoo using quality ink and proper aftercare holds up beautifully for years. White-added grey wash holds tone noticeably better than plain water-diluted grey. Recommend quality aftercare products to every client — fragrance-free lotions and sun protection significantly extend the life of grey wash work.
Best Tattoo Styles That Use Grey Wash
Grey wash is the engine behind some of the most visually stunning tattoo styles in modern ink art. Realism is perhaps the most demanding — a photorealistic portrait can require five or more grey wash shades to achieve the tonal range needed. American Traditional tattoo shading uses a simpler three-cap setup because the style values bold contrast over subtle gradients. Each style has its own grey wash demands.
Black and gray tattoo work spans everything from soft watercolour-inspired pieces to hard-edged geometric designs. The grey wash technique adapts to all of them. Understanding which style demands which setup is what separates artists who produce consistently impressive work from those who struggle with tonal inconsistency.
Realism and Portrait Tattoos
Portrait tattoos are the ultimate test of grey wash skill. They require the full five-cap setup at minimum — sometimes more. Every millimetre of tonal variation in a face must be recreated with precise black ink dilution. Pepper shading tattoo technique is especially important in portrait work for rendering skin texture and hair detail. Artists working in this style often spend years refining their grey wash consistency before attempting realistic portraiture.
Neo-Traditional Grey Wash Designs
Neo Traditional tattoo designs combine bold outlines with softer, more organic shading than classic traditional work. White-added grey wash is particularly effective in this style. The added pigment density keeps the shading visually bold even next to saturated colour fills. Popular Neo Traditional subjects in the USA include wolves, botanicals, daggers, and mythological figures — all of which benefit enormously from precise grey wash gradients.
Grey Wash Tattoo Stencil Ideas & Designs
A great stencil is the foundation of great grey wash execution. The complexity of your stencil directly determines how many grey wash shades you’ll need. A simple geometric compass design might need only three caps. A detailed dragon sleeve could demand five or more to capture every scale and shadow. Planning your grey wash setup around your stencil complexity before the session starts saves significant time and prevents mid-session surprises.
Popular grey wash stencil categories in the USA market right now include dragon flash designs, Anubis guardian figures, botanical and floral series work, and the emerging Cyber Sigilism style. Each brings its own shading challenges and opportunities for showcasing grey wash technique.
Popular Grey Wash Stencil Themes for 2025
Dragon stencils remain one of the most requested grey wash subjects in American shops. The scale texture, wing membranes, and shadow depth all showcase the technique’s full range. Floral series designs — particularly roses and peonies — use grey wash to create soft, almost photographic petal gradients. Geometric compass designs use stark contrast between light and dark wash to create optical depth. Each of these styles benefits from clean stencil transfer and a well-organised gray wash setup before the needle touches skin.
Grey Wash Tattoo for Beginners – Can You Learn Without an Apprenticeship?
The traditional tattoo apprenticeship has long been the standard entry point into the industry. An apprentice spends one to three years in a shop learning under a mentor — sweeping floors, watching sessions, and gradually practising on fake skin tattoo practice materials before touching real clients. It’s thorough. It’s demanding. And for many aspiring artists in the USA, it’s simply not accessible due to geography, finances, or time constraints.
Today, a genuine tattoo apprenticeship alternative exists in the form of structured online education. The Artist Accelerator Program is one of the most recognised online tattoo course platforms in the USA market. It uses a nine-step framework that takes complete beginners through every aspect of tattooing — including grey wash mixing, machine setup, and client safety — without requiring years of shop access. Over 2,500 students have completed the program and gone on to work professionally.
Online Learning vs Traditional Apprenticeship
Both paths have genuine merit. A traditional apprenticeship gives you live feedback, real shop experience, and industry connections that online learning can’t fully replicate. However, online courses offer flexibility, affordability, and structured curriculum that many apprenticeships lack. The Artist Accelerator Program specifically addresses grey wash — covering the drop method tattoo ink technique, gray wash setup, and how to mix gray wash correctly from your first session. Whichever path you choose, consistent practice on fake skin before moving to real clients is non-negotiable.
Frequently Asked Questions About Grey Wash Tattoos
Grey wash tattooing generates a lot of questions — especially from artists transitioning from colour work or beginners approaching the technique for the first time. Below are the most commonly asked questions with clear, direct answers.
| Question | Answer |
| How long does a grey wash tattoo take? | Depends on size and complexity — typically 2 to 6 hours |
| Does grey wash fade faster than black ink? | Slightly yes — proper aftercare minimises fading significantly |
| Is a grey wash tattoo painful? | Same pain level as any tattoo — location matters more than technique |
| Can beginners do grey wash? | Yes — with consistent fake skin practice and correct mixing knowledge |
| What’s the best ink for grey wash? | Dynamic ink black or Eternal Ink gray wash set are top USA choices |
| Do I need special needles for grey wash? | Magnum shader needles produce the smoothest gradients |
| How to keep gray washes in order? | Always set up caps in the same direction — darkest right, lightest left |
| How many ink caps do I need? | Three for Traditional styles, five for realism and portrait work |
| Can you add white to gray wash? | Yes — three drops per cap (except pure black and water caps) |
| What ink to use for gray wash? | A reputable black ink like Dynamic ink diluted with distilled water |
Mastering the grey wash tattoo technique takes patience, consistency, and a genuine respect for the details. From choosing the right ink to organising your caps in the right order, every small decision compounds into the final result on your client’s skin. Use this guide as your reference point — come back to it when your shading feels off, your ratios seem wrong, or you’re ready to add white ink to your setup for the first time. The knowledge is here. The practice is yours to build.